
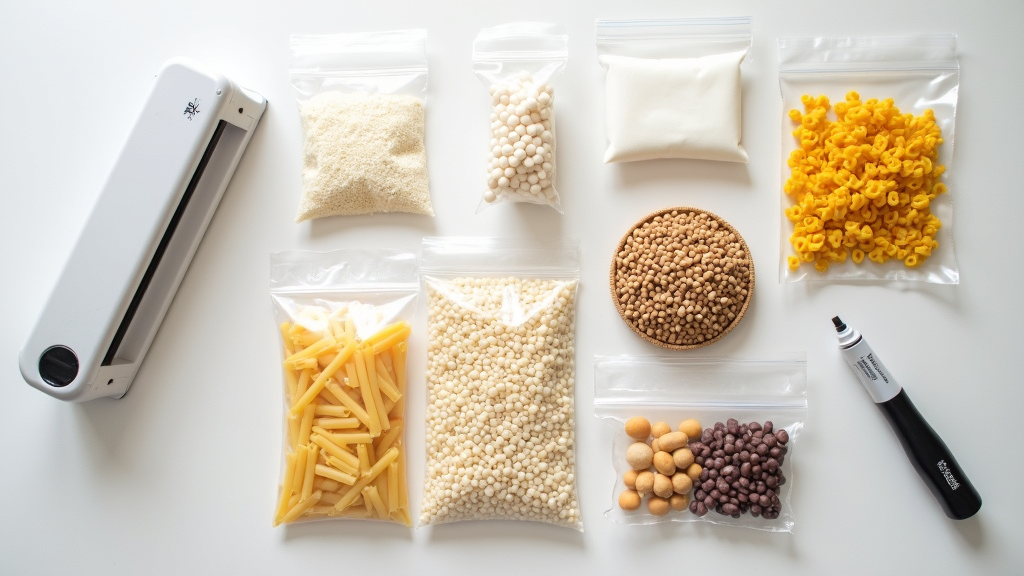
Using food-grade Mylar bags combined with the right oxygen absorbers is one of the most reliable and affordable ways to keep dry foods fresh for years. I’ve found this method especially practical for building emergency food supplies or just keeping those Costco-sized bags of rice and beans from turning stale. Here’s my personal rundown on why this combo works, how to choose your supplies, and what you can do to be sure your efforts pay off down the road.
Why Use Mylar Bags and Oxygen Absorbers?
Light, moisture, and oxygen can wreck most foods, especially grains and dry goods you want to keep for a long time. Mylar bags act like armor for your food. They’re made from a tough, shiny polyester film that blocks out light and water vapor. When sealed right, they’re basically airtight.
When you add oxygen absorbers inside those bags, you bring down the oxygen to almost nothing. These little packets are filled with iron powder that soaks up any leftover oxygen, stopping mold from growing and keeping fats from going rancid. It’s a cool little system that science geeks and home preppers both love, and for good reason; it really works.
Picking Your Mylar Bags and Oxygen Absorbers
Materials matter here. Not all Mylar bags are the same, so pay attention to:
- Bag Thickness: I stick with 5–7 mil thickness. These thicker bags handle bumps, stacking, and shuffling much better. Thinner bags might tear or let in a bit of air over time.
- Food-grade Rating: Make sure your supplier confirms it’s food safe. It should be metallized PET designed for storing edibles, not just craft foil bags.
Oxygen absorbers come in packs rated by their oxygen-grabbing ability, measured in cubic centimeters (cc). Almost all dry foods—beans, rice, oats, pasta—fit in standard sizes, but don’t skimp:
- 300–500 cc OAs for quart and gallon bags
- 1000–2000 cc for larger 1–5 gallon bags
If you’re ever on the fence, it’s safer to use more absorber capacity than not enough. You can always use a couple in a big bag. Humid climates, thinner bags, and foods packed loosely might all need a bit more.
Getting Ready Before Packing
Long-term preservation only pays off if what you’re putting away starts out in good shape.
- Check Moisture: Most grains and beans should be at or below 10% moisture. Dehydrated fruit or veggies do better at around 5%. Too much moisture can mean future mold, so it’s worth running that extra hour in the dehydrator if you’re not sure.
- Prep Your Space: Clear your counters, wipe them down, and make sure all tools, including your sealer and scoops, are nice and clean. I always keep paper towels and some sanitizer nearby because things can get messy with flour or lentils going everywhere.
Packing Your Food in Mylar Bags
Once your food and space are set, the actual packing goes quickly if you have a flow:
- Fill the Mylar bag with your chosen food, leaving about 1–2 inches clear at the top for sealing.
- Add a desiccant packet if it’s a powdery, moisture-loving food like instant milk or flour. Don’t use desiccant with regular grains, just when humidity could sneak in.
- Include the oxygen absorber right before sealing; just toss it on top of the food.
- Flatten and squeeze out air, starting at the base, then zip or heat seal as soon as possible. The less air left in, the better the result.
- Seal with a heat sealer (or even a plain clothes iron, if that’s all you’ve got). Run the heat tool slowly and press hard enough for a nice thick seal. Quick tip: You want it to look like a smooth, melt-sealed line without wrinkles or thin spots.
Checking Your Seals
Nothing’s more frustrating than opening a bucket a year later to find stale food because of a leaky bag. I always glance over every seal for evenness and run my fingers along the edge, squeezing a little to see if any air sneaks out.
- Visual Scan: Smooth seal, no gaps, no wrinkling at the ends.
- Squeeze Test: Give the seal area a gentle press. No air should escape.
- Water Test (for the extra cautious): You can dunk the sealed line underwater and look for bubbles; just dry the bag well if you try this so moisture doesn’t get trapped.
Labeling and Keeping Track
I can’t count the times I’ve forgotten what mystery food is in an unmarked bag months later. Good labeling is a lifesaver. Here’s what works for me:
- Write the packing date
- List what’s inside (“Basmati rice, 4 lbs,” for example)
- Note the oxygen absorber size and number
Permanent oil-based markers or even a taped-on piece of kraft paper work pretty well on shiny Mylar.
How to Store Filled Mylar Bags
Mylar bags can take a lot, but the less stress you put them under, the better your results.
- Temperature: Keep stored bags in a cool spot, between 50°F and 70°F. Avoid hot attics or sheds where the air gets hot and humid in summer.
- Humidity: Low humidity under 50% keeps the exterior bone dry and stops condensation.
- Stacking Smart: I slide my filled bags into 5 gallon plastic food buckets or large storage totes. This adds an extra layer that rodents and bugs don’t like, and it stops bags from getting squashed or punctured.
- No Direct Sunlight: Even though Mylar is light-proof, it’s best to keep bags away from sunny windows or spots that heat up sitting next to pipes or hot water heaters.
How Long Foods Last and How to Rotate Them
When packed and stored right, most dry foods last longer than you’d ever guess:
- Whole grains and beans: 10–15 years
- Rolled oats, pasta, dry corn: 5–10 years
- Dehydrated fruit/veggies and powdered dairy: 5–10 years
Use a rotation system; pull older food out and use it first, always replacing with new bags at the back or bottom of your stack. Simple logs or bin inventories make this a breeze, and you avoid wasting your supplies.
Common Mistakes and How to Fix Them
- Food Not Dry Enough: Damp foods make clumps or go moldy, even inside Mylar. If you spot this, ditch the problem bag and dry your next batch more thoroughly.
- Using Absorbers That Are Too Small: If bags puff up (meaning air is trapped inside), open them and repack with a bigger OA.
- Bad Seals: Any bag with a weak or half-melted seam is risky. Just cut, remove the OA, refill with a fresh one, and seal again.
Extra Safety and Health Tips
- Oxygen Absorber Safety: The little packets aren’t poisonous, but don’t let pets or kids play with them. Toss them right after use.
- Watch for Critters: Even thick Mylar can be chewed by a motivated mouse or punctured by dropped sharp tools. Give your storage area a quick lookover once a month as a habit.
Advanced Preserving Tips
Once you have the basics down, there are a few tweaks I’ve picked up to get even more out of this preservation method:
- Seal Extras: Keep a few spare Mylar bags and OAs in zip bags so you’re always ready for leftovers or special deals.
- Vacuum-Assist: Use a straw or simple vacuum gadget before the final seal to remove extra air.
- Layering: If you’re really going for long-haul storage, double-bag fragile items for added protection.
Food Storage With Peace of Mind
Using Mylar bags and oxygen absorbers is pretty simple once you get the hang of the routine. With a bit of planning, good labeling, and a careful setup, you can enjoy peace of mind knowing your long-term food is safe, fresh, and there whenever you need it. For those who want to get even deeper into food storage, check out online forums or local workshops where you can pick up extra tips and share your experience with others interested in long-term prepping. This sense of community can really make storing your food feel much less daunting and even a little bit fun. Taking the time to pack food properly now adds up to serious rewards down the line, especially if you’re ever caught in a pinch. Extra preparation today leads to more confidence tomorrow, knowing your efforts mean your food stays fresh and ready for years to come.