
If you like to prep, garden, or just cut down on food waste, then you have to get a hydrator for your kitchen. Drying your own fruits, veggies, herbs, or jerky at home doesn’t just help you save money. A side benefit is that you also know exactly what’s in the food you are feeding yourself and your family. Here’s a complete look at what you’ll want to know before you use your dehydrator for the first time. So Lets get to it.
 Is Dehydrating Food a Solid Method for Setting Aside Emergency Food?
Yes, dehydrating food is a solid way of setting aside emergency food stores, but it must be a part of a complete system including canning, freeze-dried foods, vacuum-sealing foods, and mylar bagging foods. Each method serves it’s purpose.
And never forget the emergency food storage adage. Always buy what you eat and eat what you buy. This keeps your food stores truly rotated and mainly fresh at all times.
With that being said, lets get into the nitty gritty of dehydrating food.
Top Things to Know About Using Dehydrators to Preserve Food
- The Principle of Dehydration: Removes moisture to cut back on microbial growth and slow down enzyme reactions. Most fruits and veggies get dried until they have less than 10% moisture.
- Types of Dehydrators: Stackable tray models are wallet friendly but usually need you to rotate trays. Vertical airflow units (sometimes called towers) give you uniform drying without needing to move the trays. There are also commercial cabinet dehydrators for when you really need to dry a lot at once with precise controls.
- Temperature Control: Fruits, vegetables, and herbs do best around 125–135 °F (52–57 °C). Meats for jerky need a higher setting (150–160 °F, or 66–71 °C) for safety. Nuts and seeds you want to keep “raw” should stay at or below 115 °F (46 °C).
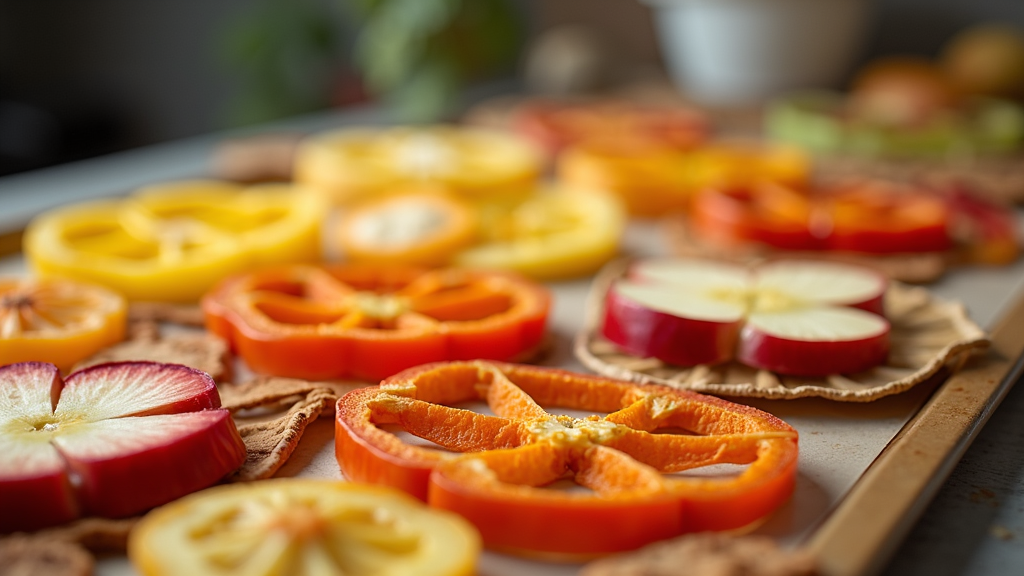
- Slice Thickness & Uniformity: Slicing things 1/8–1/4 inch thick makes drying more even. Using a mandolin or food slicer helps you keep things consistent.
- Pre-Treatment Methods: Blanching vegetables inactivates enzymes and helps them hold their color. Acid dips (lemon juice or ascorbic acid) keep fruits from browning. For jerky, you can use marinades or spice rubs to add flavor and minimize microbes.
- Airflow & Tray Spacing: Don’t crowd your trays. Leave space so air can get around. Clean out fans and vents often for best results.
- Drying Times & Monitoring: Fruits usually take 6–12 hours, vegetables about 4–10, herbs 2–6, and jerky 4–8. Do the “tooth-test”: you want fruit to feel leathery and bendy, chips should snap, and jerky should not be squishy.
- Storage & Packaging: Keep dried food in a cool, dry, dark spot (under 60 °F, less than 50% humidity). Use airtight containers—Mylar bags with oxygen absorbers, vacuum seal bags, or mason jars all work great.
- Shelf Life Expectations: Herbs stay good for 1–3 years, fruits and veggies 1–2 years, and jerky about 6–12 months (seal or freeze it to stretch that a bit more).
- Food Safety & Hygiene: Make sure trays, blades, and counters are sanitized. Package cooled foods right away so they don’t soak up moisture. Always label with the date and type of food.
The Science Behind Food Dehydration
Dehydration is all about removing enough water from foods so bacteria, yeasts, and molds can’t grow easily. Microbes need moisture to reproduce; lower the moisture, and you slow down spoilage. Most fruits and vegetables become shelf stable once you drop their moisture below 10%. That’s also what keeps them from tasting slimy or fermenting in storage.
Dehydration isn’t new. People have preserved food by sun and wind drying for thousands of years. Modern dehydrators just make it faster and easier to control temperature and airflow, eliminating a lot of guesswork and weather dependency.
Types of Dehydrators: Finding the Right One for You
It can feel confusing to pick a dehydrator, but a few main models cover most needs:
- Stackable Tray Models: Usually the most budget friendly. Great for occasional use or for people just starting out. One small downside, sometimes you have to shuffle trays since heat may be stronger at the top or bottom.
- Vertical Airflow (Tower Units): These send warm air up or down through the trays, with more uniform heat. You don’t have to rotate trays, so you can set it and forget it.
- Commercial Cabinet Dehydrators: Built for big batches, with trays that slide out and digital controls that let you fine tune temperature and drying time. They’re more expensive but nice if you’re growing or buying produce in bulk.
All types uf dehydrators will get the job done, but the choice comes down to batch size, budget, kitchen space, and how often you’ll use it. If you plan to dry a lot all at once (like harvests or meal prep for camping), going bigger with a cabinet or vertical model can cut down your work.
Prepping Your Food: Key Steps for Great Results
How you slice and prep your food before it goes into the dehydrator directly affects the outcome. Here’s how I keep things simple and get even, tasty results:
- Slice Evenly: The thinner you cut, the faster (and more evenly) food dries. 1/8 to 1/4 inch slices work nicely for most things. Mandolins or food processors with slicing discs are really helpful.
- Blanch Vegetables: Blanching is just a quick dip in boiling water, then cool in an ice bath. This helps vegetables like beans, carrots, or broccoli keep their bright color and stops enzymes that cause off flavors.
- Acid Dips for Fruit: Give apples, pears, and peaches a dunk in lemon juice water or ascorbic acid mix. This step keeps them from browning and makes for better looking snacks.
- Spice and Marinade Jerky: Besides adding flavor, salt and acid in marinades help slow bacteria. Use lean meat and trim off extra fat. Higher fat content food goes rancid quickly and shortens shelf life.
Drying Like a Pro: Managing Airflow, Tray Spacing, and Time
No matter what model you own, some universal tips make drying more efficient:
- Don’t Crowd Trays: Leave space so warm air constantly circulates. Food touching or piled up can cause some parts to stay wet (“shadowing”), leading to spoilage.
- Clean Airflow Vents and Fans: This keeps air blowing evenly and helps prevent dust or flavors from old batches affecting your current batch.
- Monitor Drying Times: Dehydration isn’t an exact science. Everything from the weather to slice thickness changes how long foods take to dehydrate. Fruits typically dry over 6–12 hours; vegetables, 4–10; herbs, 2–6; and jerky, about 4–8 hours. Check occasionally to see if the foods are dehydrated to your satisfaction. Fruits should feel leathery but not sticky, and vegetables should snap when bent.
Packaging and Storage: Lock in Freshness
Because dried foods can reabsorb water from the air, how you store them is super important for shelf life and taste. I like to:
- Cool food completely before packaging. Warm food can trap steam in bags.
- Use airtight packaging like vacuum seal bags, mason jars (with tight lids), or Mylar bags with oxygen absorbers. Each of these slows down light and oxygen exposure, keeping food tasting fresher.
- Store everything in a cool, dark, dry place (like a pantry shelf or a dedicated storage bin under 60 °F and under 50% humidity).
- Label each container with the date you dried the food and what’s inside.
Done right, dried herbs often last one to three years. Fruits and vegetables around one or two. Jerky about six months to a year, or longer in the freezer.
Staying Safe: Food Hygiene and Smart Practices
Food safety is a big deal whenever you’re preserving food. So it’s best not to take any shortcuts. I always:
- Wash my hands, knives, cutting boards, and trays with hot soapy water first.
- Keep raw meat separate from produce if making jerky.
- Store dehydrated food right away so it doesn’t pick up moisture again.
- I make sure my dehydrator reaches and maintains the correct temp (especially for meats).
- Keep records. Label each batch with the food type and drying date.
If you see mold, smell anything that’s off, or notice discoloration, it’s safer to toss that batch out rather than risk getting sick.
In Summary
Dehydrating food is a time tested way to take advantage of seasonal abundance, avoid waste, and a way to may delicious home-made snacks. The key parts all center around lowering food’s water content below the limit for spoilage (about 10% for most foods). The type of dehydrator you choose depends on your needs. Stackable tray models work well for small households, while large vertical or cabinet models handle big batches or busy seasons.
Success with dehydrating at home comes down to a few basics: steady temperature (with the sweet spot for most foods between 125–135 °F), steady airflow, and uniform food size for even drying. Quick prep steps like slicing thin and using acid dips or blanching can make all the difference for quality and safety. Keep an eye on dryness during the dehydration process, and grab snacks out as they become leathery, snap, or jerky like texture, depending on the type.
Storing dried foods in airtight, labeled packages in a cool dark place is important for shelf life. Herbs can last a long time, dried fruits and veggies a year or more, and jerky up to a year if vacuum sealed or frozen. Most importantly, never skip proper food hygiene, label everything, and don’t take risks with anything that looks or smells off. With a few tools and a little practice, you’ll have a pantry full of healthy, shelf stable eats you prepped yourself. That’s always worth it.
What Do You Think?
What are some of your tips and tricks for dehydrating? Do you have any good recipes that you come back to time and again? Or maybe you are new to dehydrating and have a question or two. It’s all good here. Just leave them all down in the comments below. Either I or some of the more frequent blog visitors can help you out in the comment section below.
And do me a big favor. If you enjoyed this article and think your friends may benefit from it, please share it out through your social media networks. It will be a great way to get the information I share with you daily to toher people that can use it.
Thanks a bunch for all your support and see you in the next post.