Canning is a skill that’s been handed down for generations, and honestly, it’s one of the top ways I’ve found to stash away each season’s flavors for later. If you’re looking to save garden harvests, fill up on homemade meals, or get your pantry ready for emergencies, canning can be a pretty handy tool. There are real benefits and drawbacks in the process you’ll want to think about before setting those jars to boil.

What Is Canning?
Canning is all about keeping food safe and shelf stable by sealing it into airtight jars after heating it up to knock out anything that could spoil it. There are two main ways to do it safely at home:
- Water Bath Canning: Best for high-acid foods like fruits, jams, jellies, and pickles. You submerge the jars in boiling water for a set time so that bacteria and enzymes don’t get the chance to survive.
- Pressure Canning: This method is for low-acid foods such as most vegetables, meats, stews, or beans. They need higher temperatures (at least 240°F/116°C) under pressure to guarantee safety from things like botulism.
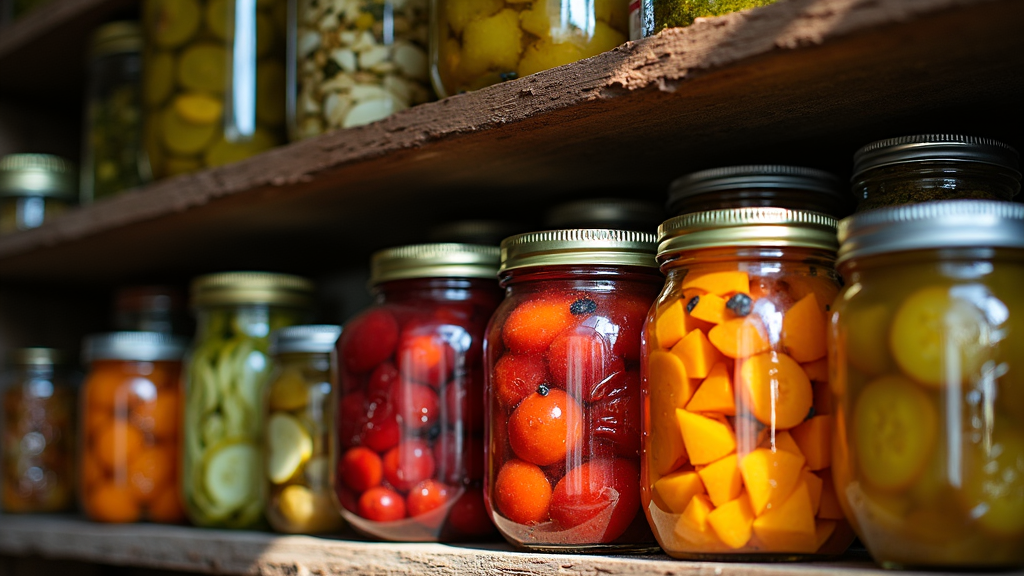
Both methods end with sealed jars that can sit on your shelf for years if you keep them cool and away from sunlight.
Pros of Canning for Long-Term Storage
I’ve stuck with canning over the years because there are a lot of practical upsides, especially for those who want more control over their food.
Extended Shelf Life
When you follow trusted canning methods, those jars can last from one to five years or more. Acidic foods like fruit preserves or pickles keep their punch of flavor longer than most vegetables or meats.
Nutrient Retention
Canning doesn’t totally wipe out a food’s nutrition. The heating is relatively fast, and once sealed, nutrients break down slower than foods left sitting in the fridge or pantry. Plus, you control what goes in—say no to strange preservatives, unnecessary colors, or added sugar if you’re avoiding that.
Cost Efficiency
You can save a serious amount by canning fruits and veggies from your own garden or from buying in bulk during peak season. Instead of letting surplus go to waste, you package it up for later. Over several seasons, the savings are real. The more you eat what you’ve canned, the less you buy processed or frozen foods from the store.
Flavor and Texture
Home-canned goods often taste fresher and are easier to customize compared to store options. It’s fun dialing in spice or sweetness for things like salsa, jam, or snap beans. Some items hold their texture surprisingly well—think crunchy pickles or tender carrots right from the jar.
Food Security and Emergency Prep
There’s a comfort in knowing that if the power goes out or there’s a shortage at the store, you’ve got food you can eat straight from the jar. This comes in handy after storms, in power outages, or if you’re after that off-the-grid vibe.
Environmental Benefits
Glass jars? Almost endlessly reusable. Aside from buying new lids each time, you sidestep single use tins or plastic packaging. Over time, that’s a lot less waste headed to landfills, and you skip out on buying products sealed in plastic-lined metal cans.
Cons of Canning for Long-Term Storage
As much as I love canning, there are definite obstacles and inconveniences that pop up, sometimes more than folks expect.
Initial Investment and Equipment
Getting set up for canning isn’t free. Pressure canners, water bath pots, glass jars, and all the extras can easily cost $100–$200 to get rolling. Plus, you’ll need new lids each year, since they aren’t made to be reused for safety. The gear lasts for years, but that up-front cost is real.
Time and Effort
Canning is a bit of a project, especially if you’re making big batches. Washing, peeling, chopping, filling, processing, labeling, and checking the seals once cool—it can fill a whole afternoon or even a day. Afterwards, rotating jars and inspecting them for any loose lids takes regular attention.
Safety Risks If Done Improperly
Safety is the number one worry. Not following trusted, up-to-date recipes or missing the time or temperature mark can let bacteria survive in those jars. Serious stuff like botulism is no joke. Only stick with USDA or university-tested methods and always check if your altitude needs a different time or pressure setting.
Storage Needs
Jars are heavy and glass can break. You’ll need solid shelves in a cool, dry, dark space. Basement or pantry storage works best. If you’re short on space, going beyond a couple dozen jars gets tricky.
Gradual Decline in Quality
With time, even the best-canned goods will fade a bit—colors dull, flavors mute, vitamin C slips away. Acidic foods can slowly wear down metal lids, causing off flavors or letting in air if left too long.
Power Required During Processing
While the jars don’t need power to store, canning itself needs a steady heating source—usually a stove or propane burner. Good to keep in mind if prepping for long emergencies when fuel might be scarce.
Best Practices for Safe and Rewarding Canning
Canning gives the best results when you stick to safe steps and keep things running smoothly. Here’s what works in my kitchen and for other home canners I know:
- Use Reliable and Current Resources: Stick to the USDA, National Center for Home Food Preservation, or your local extension office recipes. They’re based on science and tested for safety.
- Stay Organized and Rotate Stock: Use the oldest jars first and always label them with the date you canned them. It cuts down on guessing.
- Invest in Quality Tools: Don’t cheap out on essential gear. A good pressure canner, strong shelves, and must-have tools like jar lifters make things much safer and more comfortable to use.
- Maximize Storage Space: Keep jars away from heat, sunlight, and dampness. Stack smartly so jars stay chip-free and nothing topples over.
- Mix in Some Variety: Not everything is best for canning. Some foods are better when dehydrated, freeze dried, or kept with a vacuum seal. Using a mix helps keep meals interesting and flexible.
Important Points Before You Start Canning
Whether canning’s a fit for your home comes down to what you’re after, how much spare time you have, and if you enjoy detailed, step-by-step kitchen projects.
- Cooking for a crowd or want a regular supply of soup bases, ready-to-make fruit, or salsa? The rewards are great.
- Just cook for fun or have tight shelf space? Try starting with a handful of small batches each year.
- If you like kitchen work and reducing food waste, canning is probably for you.
But if you’re pressed for time or dislike following precise recipes, you may find other methods like freezing or drying a better fit.
Wrapping Up The Pros And Cons
Canning food at home is a practical way to keep your garden harvests fresh longer, save money, and keep some backup food on hand. With modest investment and good, consistent habits, you can have jars of soup, veggies, and fruit preserves ready for every season. Stick to reliable recipes, watch your pantry stock, and use a blend of preservation methods for the greatest flexibility. That’s how you get the most out of your jars, year after year.