Emergency food storage is something I started looking into after getting caught off guard during a major storm a few years ago. Having some extra food can make things a lot less stressful when emergencies pop up, whether it’s a power outage, snowstorm, or even a longer event that messes with supplies. So in this article, I’m going to give you the basics of emergency food storage in a way that’s easy to follow and practical.
So Is Starting Your Food Storage Hard to Do?
Absolutely not. Food Storage for a week or two is easy to do. Really all you need is a warehouse club membership and you can be stocked for about a week or two with little money (based on the amount of food that you buy). Extending out longer than two weeks or so isn’t difficult, either. You just have to learn a few valuable skills when it comes to food and water storage and you can store for up to a year if you wanted.
And the best part is you will learn how to on this website, starting here on this first post. So lets dive in.
Why Emergency Food Storage Matters
Counting on grocery stores for food is fine when times are normal, but supply chains can get messed up quickly. Just looking at the past few years, I’ve seen empty store shelves more than I’d like to admit. Knowing I have a backup of food gives me peace of mind that I can feed myself and my loved ones in a pinch.
Emergency food storage isn’t about prepping for some doomsday scenario. Instead, it’s all about being prepared for whatever life sends our way. Short-term stuff like severe weather, floods, or even a lost job can make a stocked pantry feel like a smart idea. Federal agencies like FEMA recommend keeping enough nonperishable food ready to last everyone in your household for at least three days (Ready.gov).
Plus, emergencies can hit when you least expect it. Being ready means taking small steps now that pay off later. Whether you have kids, pets, or just want peace of mind, a little preparation makes your life less stressful when things happen.
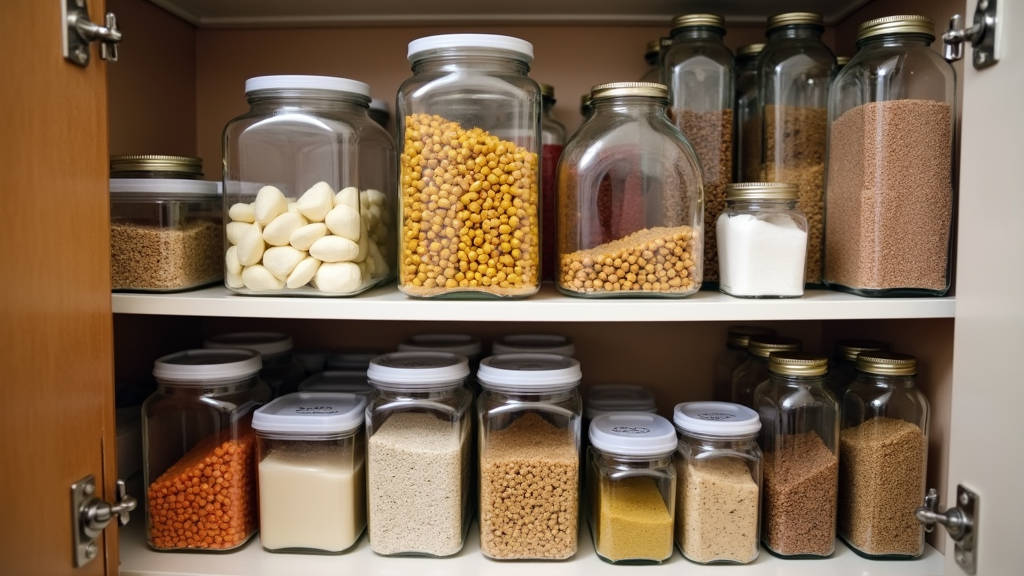
Types of Emergency Food to Store
I used to think emergency food meant cans of bland meals, but there’s lots of practical options. Here’s a quick rundown of smart choices you might want to build up:
- Canned Goods: Beans, soups, tuna, chicken, and fruit last a long time on the shelf and are easy to work into recipes. They keep your meals interesting.
- Dry Staples: Rice, pasta, oats, flour, dried beans, and lentils are sturdy and super versatile.
- Freeze Dried or Dehydrated Meals: These take up less space and last way longer than your average groceries. Many brands now cook up eye catching meals that just need boiling water to be ready.
- Ready-to-go Packaged Foods: Nut butters, jerky, granola bars, trail mix, and shelf-stable milk work for no cook emergencies — and they’re great for snacking too.
- Bottled Water and Drink Mixes: Not technically food, but water is essential for preparing meals and staying hydrated, so make sure you stock up here!
Mixing different types gives you more meal options and helps with food fatigue if you ever have to use your emergency supplies for a while.
How to Start Your Emergency Food Storage
Starting your food storage doesn’t have to be pricey or tough. Here’s how I approached things:
- Check Inventory: Start by peeking through what you already have in your kitchen or pantry. Most people are surprised by how much is already sitting on their shelves.
- Set a Realistic Goal: Figure out if you want to prep for three days, a week, or even longer. My advice: start at three days and build up from there, so it feels doable.
- Make a List: Write down what everyone in your family already likes to eat and figure out what’s missing from your stash. It makes more sense to store foods you’ll want to eat.
- Pick Up Extras: Each grocery run, grab one or two extra cans or bags of dry staples. Over time, your supply will grow painlessly and within your budget.
- Track Dates: Label things with a marker, and move the oldest foods to the front, so you use them first. This helps avoid a pileup of expired cans and wasted money.
What to Look for in Emergency Food Supplies
Not every pantry item is cut out for emergencies. Here are my tried and true tips:
- Long Shelf Life: Look for foods that stay safe for at least a year or two. Some freeze dried meals can last up to 25 years, and plenty of canned and dry foods last more than a year.
- Easy Prep: Stick with foods that need little or no cooking so you’re not stuck if the power is down. Just add water meals or snack foods are your friend.
- Nutritional Value: Pick foods with protein, healthy fats, and fiber — real fuel to keep you and your crew going.
- Dietary Needs: Account for allergies or preferences in your household. Thankfully, gluten free, dairy free, and vegetarian options are now easy to find in emergency kits too.
Common Mistakes to Avoid
There’s a learning curve to emergency food storage. Here are some mistakes to watch out for:
- Sticking with Only One Kind of Food: Just storing rice and beans might sound budget friendly, but it gets boring and misses some nutrients.
- Forgetting Water: Lots of folks focus on food, but clean water is way more important. FEMA’s advice is at least one gallon per person per day; more if you can manage it.
- Skipping Expiry Dates: If you don’t rotate, you’ll end up tossing money on food you never ate. Marking dates and using things regularly avoids waste.
- Poor Storage: Always keep your stash in a cool, dry area, away from sunlight and pests. Hot garages or damp basements make food spoil faster.
- Storing Foods Nobody Likes: Your emergency stash should match your real food tastes. If you wouldn’t eat it under normal circumstances, you probably won’t want to eat it when you’re stressed, either.
Extra Gear That Comes in Handy
Beyond food, here are some extras I always recommend to make using your supplies a lot easier:
- Manual Can Opener: A must for canned goods. I keep a backup, just in case.
- Camp Stove and Fuel: Even a lightweight single burner camp stove lets you cook and heat water during a blackout. Always use it outside or with plenty of air flow.
- Water Filtration: Small filters or purification tablets help you stretch your bottled water in a pinch, especially if you need to use tap water or other sources.
- Utensils and Paper Goods: Paper plates, cups, and forks make cleanup fast when water is tight.
How to Rotate and Maintain Your Food Storage
Keeping your emergency food stash fresh is simple with a little upkeep. Here’s my system for making it all work:
- First In, First Out: Put new items at the back and pull older stuff forward, so you’re always using what’s closest to expiry first.
- Regular Checkups: Every six months, do a mini check to see what needs replacing, what’s running low, and what’s still fresh.
- Maintain a List: Write out what’s in your stash and update it when you add or use items. This keeps you on top of your supplies without hunting in cupboards.
Eye Catching Features of Commercial Emergency Food Kits
If you’d rather keep things easy, premade emergency food kits offer loads of excellent features. Here’s what I like best about these kits:
- Portioned Servings: Individual serving packages let you avoid opening giant cans for a single meal, which helps with portion control and freshness.
- Effortless Prep: Most just need water — hot or cold — and zero cooking skills.
- Clear Nutrition Info: Labels are up front about serving sizes and calories, making it simple to split food among family members.
- Space Saving Containers: A lot of kits arrive in stackable tubs that fit nicely into closets or under beds, so storage is hassle free.
Wrapping Up
Emergency food storage is a small investment that takes the stress out of unexpected hurdles. Building your shelf a little at a time makes it manageable and easy to keep up. Whether you’re dealing with power outages, severe storms, or just want to be prepared, having food ready means one less thing to worry about when life gets unpredictable.
Start by tossing a few extra cans or dry goods into your next shopping trip, stay on top of rotating your supply, and you’ll find yourself better prepared and much calmer when surprises come your way.
In Conclusion
Is everything clear a crystal, or clear as mud? Do you have clarity or is your mind spinning right now? If you’re confused, don’t worry. I have more articles on these different avenues of food storage coming your way. If you have any questions, leave them in the comments ow and I will be happy to answer them for you.
And if you are getting any value from this content, please share it with your friends and family on social media. You are just as much my social media algorithm as Google, Yahoo, and Bing. Thanks a bunch for the shares and the comments, and I will see you in the comments and in the next article.