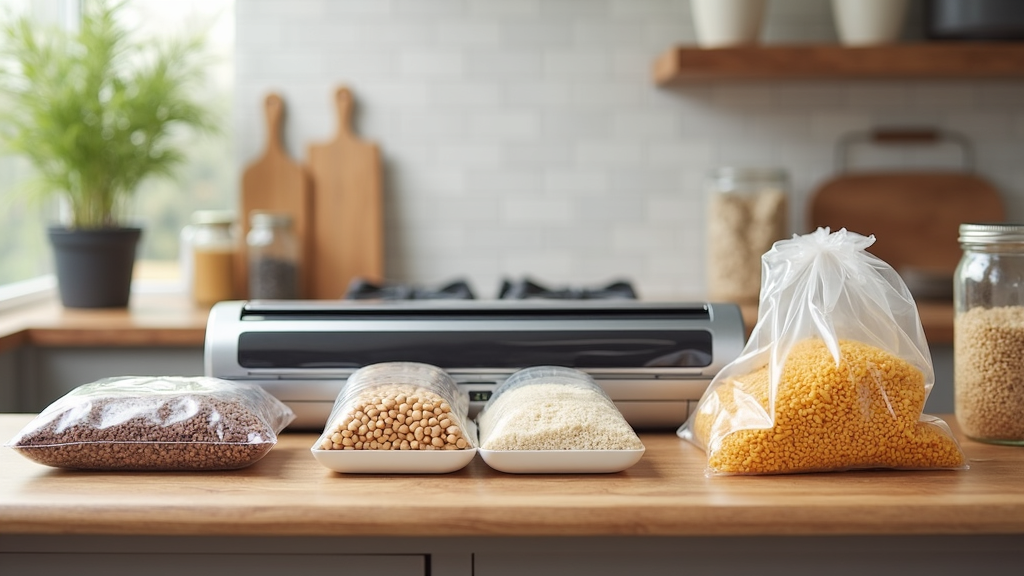
Vacuum sealers make storing emergency food at home way more reliable and affordable than you might expect. I’ve found them pretty handy for making sure everything from rice to steaks last much longer than if I just tossed it in a plastic bag or jar. Vacuum sealing isn’t just for fancy kitchens; it’s a real game changer for anyone building a food reserve. I’ll show you the pitfalls, tricks, and gear you should be aware of as you set up a supply that actually stays good when you need it most.

Vacuum Sealing Basics for Emergency Storage
The main job of a vacuum sealer in emergency food storage is to suck the air (especially oxygen) out of a bag or container before sealing it up tight. Oxygen is what causes most foods to go bad thanks to mold and bacteria; it also makes food lose it’s original flavor over time. Remove the oxygen, and you’re slowing down everything from spoilage to freezer burn.
Vacuum sealing creates airtight environments that work really well for extending the shelf life of dry goods, fresh foods, and even leftovers. You’re basically cutting off the stuff that spoils your supplies, which is especially important for emergency food that might sit for months or even years. Some people are surprised that vacuum sealing can even boost the shelf life of foods like cheese and cured meats, making those items even more valuable in a pinch.
Kinds of Vacuum Sealers Worth Considering
There are three types of home vacuum sealers you’ll likely come across. Each comes with its own strengths for emergency storage situations:
- External Vacuum Sealers: The most common option for home use. These clamp onto special bags and pull out the air. They’re great for anything that isn’t liquid. They’re fairly affordable and easy to find. You can use them for just about every dry or solid food in your pantry.
- Chamber Vacuum Sealers: On the pricier side, but these handle liquids much better and are super handy if you’re prepping big batches of food, such as soups or chili. They vacuum from inside a sealed chamber, so none of your soup gets sucked into the machine. Chamber sealers also work faster for bulk prepping, which is a plus if you’re stocking up for emergencies.
- Handheld Sealers: These are small and battery powered, made to reseal zipper style vacuum bags or containers. They’re portable and solid for sealing smaller batches or resealing open bags on the fly. Many people keep a handheld sealer for resealing snacks or emergency rations after partial use.
Why High Barrier Packaging Matters
Using good quality bags is really important if you want your vacuum-sealed food to last. Look for multilayer bags made from materials like PA/PE (polyamide/polyethylene), or specialty bags with extra oxygen barriers from PVDC (polyvinylidene chloride) or EVOH (ethylene vinyl alcohol). Cheaper, single layer bags are much more likely to develop leaks, get punctured, and let in air over time, which defeats the point of sealing things.
High barrier bags are particularly useful for foods you won’t check often or plan to store for more than a year. Spending a few extra cents on quality bags saves money in the long run since you’ll have less spoilage and waste. Bags made for vacuum sealers are heat compatible and resist stretching or tearing far better than regular storage bags.
Proper Food Prep Before Sealing
Before you even turn the machine on, it pays to prep food the right way. Make sure hot foods cool down completely—vacuum sealing hot stuff just creates trapped steam and moisture, which ruins the seal and can cause bacteria growth. Pat raw meats and produce dry for the same reason. If you’re sealing up liquids or anything with a lot of moisture (soups, sauces, berries), pre freeze them on a tray first so you don’t suck liquid into the sealing area. This quick step keeps your sealer safe and your seal strong.
For dry bulk items, like rice, flour, and beans, portioning them into manageable quantities before sealing makes future use easier. You can also add a small oxygen absorber to each bag of dry goods for an extra boost in extending shelf life.
Getting Reliable Seals (and Why It’s Super Important)
A bad seal can ruin your whole setup. Most vacuum sealers have a “dry” or “moist” mode switch; check your manual so you’re using the right one. Always wipe the sealing strip area clean, and double check the edge of your sealed bag for any gaps or bubbles. I like to give each bag a quick visual check, pressing gently to see if any air sneaks in before I stash it away.
Every now and then, I’ll grab a bag after a month to make sure the seal is still tight. If you find leaks, eat or repackage that food sooner rather than later. Don’t forget to check your vacuum sealer periodically for debris or stuck food particles; a dirty sealing strip can create weak or failed seals.
Protecting Against Freezer Burn and Spoilage
One of the most underrated perks of vacuum sealing is how well it fights off freezer burn. Sealing out air means moisture stays inside the food, not evaporating and crystallizing on the bag. Properly sealed meat or fish can last years instead of months in the freezer and comes out tasting way better.
For dry goods like flour, beans, or nuts stored in cupboards, vacuum sealing keeps pantry pests and humidity at bay. Keeping air away from your food means a longer lasting, fresher tasting stash for emergencies. It’s especially useful for nuts and seeds, which can go rancid from exposure to air.
Best Storage Locations and Conditions
- Frozen Foods: Store vacuum-sealed items at 0°F (−18°C) or colder. Deep freezers work best for longer term storage and keep fluctuations to a minimum.
- Refrigerated Foods: Items like cheese or lunchmeat should stay under 38°F (3.3°C) for the best shot at staying fresh.
- Dry Goods: A cool, dark spot like a basement pantry is best. Avoid putting vacuum-sealed bags somewhere hot (like a garage in summer) or in direct sunlight, since heat and UV can speed up spoilage even through tough bags.
Air circulation and stable temperatures are your friends for food longevity. For large families or long term prepping, consider dividing your storage between two or more locations just in case one area gets too hot or loses power.
Accessories to Give Your Game a Boost
Most vacuum sealer brands offer accessories that are really helpful for emergency prepping:
- Jar Sealers: Use these to seal mason jars full of dried goods, pasta, or dehydrated fruit. It’s a great way to keep jar-packed food fresh without canning, and you can reseal after every use.
- Bag Roll Cutters: These let you make custom length bags, so you’re not wasting space (or bag material) on small or oddly shaped foods.
- Container Hoses: Some sealers come with hoses that let you vacuum air out of big canisters or even wine bottles. This is useful for bulk storage or odd containers that won’t fit in a standard bag.
Smart Organization and Food Rotation
Organization makes a huge difference when emergency food is involved. Portion out food into meal sized or single serving pouches, pressing the food flat for easy stacking and fast thawing. Always label each bag with the contents and the date sealed so you can use the oldest items first (the “first in, first out” rule). It helps you spot food you should use up before it goes past its prime.
Using clear bins or baskets can help keep your vacuum-sealed foods sorted by type or use. If your family has special dietary needs, color-coded labels or bins may save time in a stressful moment.
Food Safety: Anaerobic Pathogens and Other Tips
Vacuum sealing creates a low oxygen environment, which is usually good for slowing most spoilage. But a lack of oxygen can also be risky for some bacteria, like the kind that causes botulism, so you shouldn’t vacuum seal fresh, moist foods and leave them at room temperature for long periods. Always pair vacuum sealing with refrigeration or freezing for things like cooked foods, cheese, or raw meat; use classic canning or oxygen absorbers inside mylar bags for long term dry pantry items like flour or beans.
Vacuum sealing is a supplement to, not a replacement for, proper preservation and storage methods. Storing the wrong kind of food the wrong way brings more risk than you need in an emergency stash. If in doubt, check trusted sources or guidelines for safe practices.
Quick Reference Checklist for Vacuum Sealing Emergency Foods
- Pick the right sealer and bag for your job (external for most, chamber for liquids, handheld for quick reseals).
- Prep food so it’s cool and dry before sealing.
- Use high barrier, quality bags to resist punctures and leaks.
- Check seals as you work, and again a month or so later.
- Store in the coolest, darkest place available to make food last longer.
- Label everything by content and sealing date for organized rotation.
Vacuum sealers make emergency food storage easier, cheaper, and a lot more flexible. Once you get used to a few best practices—good prep, good bags, careful storage—your emergency food setup becomes a lot stronger. The peace of mind gained from having meals ready to go in any situation is well worth it, especially when sealed food lasts longer and stays fresher. If you’re looking to add to your prepping or just want to cut down on food waste, vacuum sealing is a habit worth picking up.